基于 Puppeteer 生成分享海报功能的安装和使用
思考怎么去生成图片
用 php 处理图片的水印去实现,比较复杂,需要定位。
用 canvas 去处理 html dom 节点保存输出图片,需要处理定位,小程序同理。
使用 js 插件把 html 转成 canves 在转成 图片输出
使用 puppeteer 无头Chrome节点API 工具去实现。
其实就是用谷歌浏览器去打开网页然后截图保存到本地
经过前后端同学的紧张讨论下,最后勇敢的使用了第4个方案:
在程序员界没学习一项新的知识都需要打印一段 Hello World,那么我们就开始实现第一步
本地部署
首先熟练的打开了 iterm 工具执行命令
安装 puppeteer
mkdir ~/code/puppeteer && cd ~/code/puppeteer

yarn add puppeteer
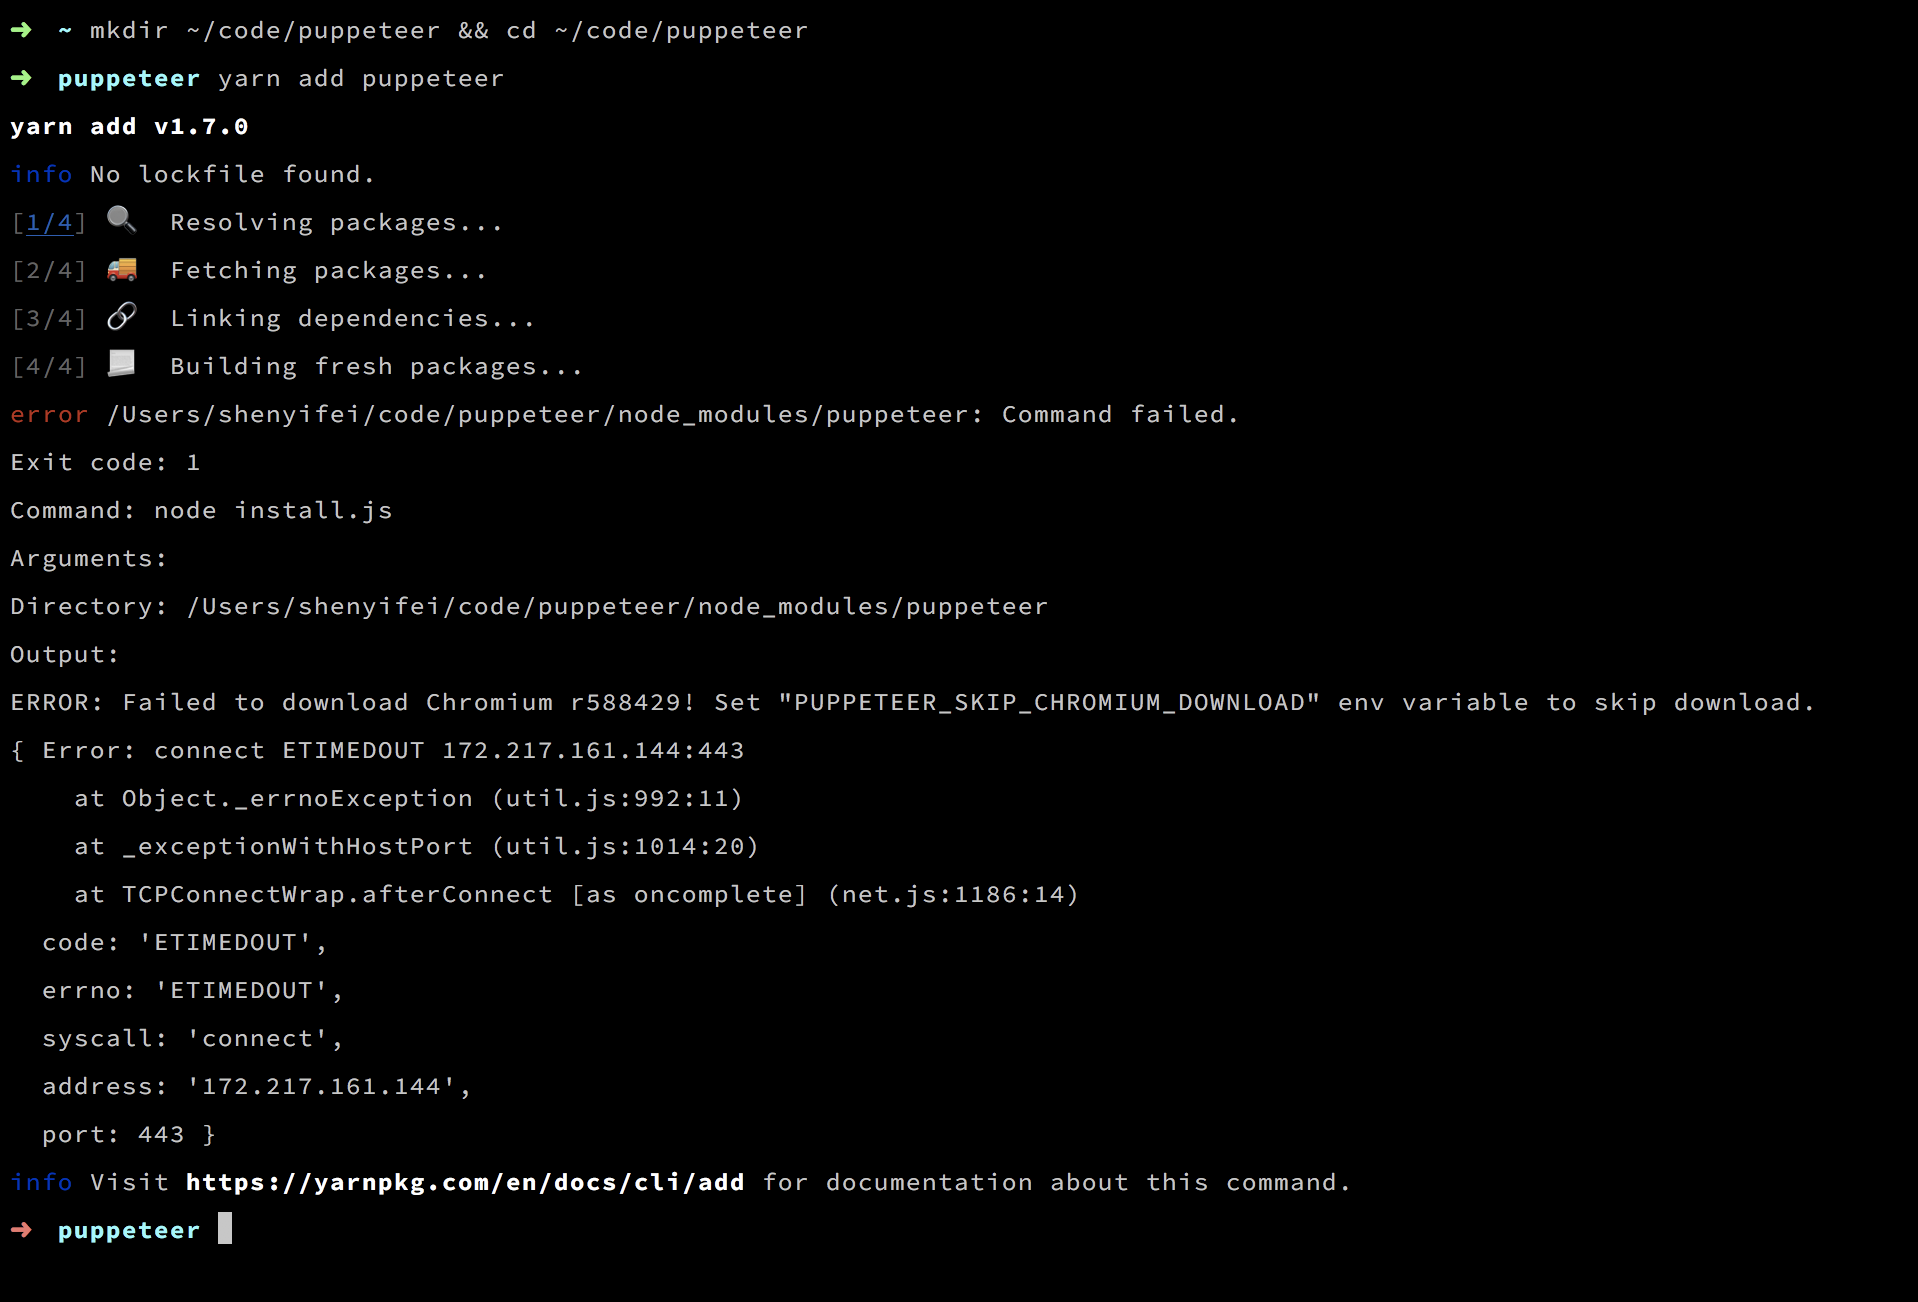
这通常是由于 Chromium 浏览器未正常下载到而引起的。这个时候,我们可以先设定环境变量,跳过安装 Chromium 的步骤,然后手动翻墙去下载:
set PUPPETEER_SKIP_CHROMIUM_DOWNLOAD=1
然后还需要手动的指定执行的目录,这里我们不多的去介绍了。
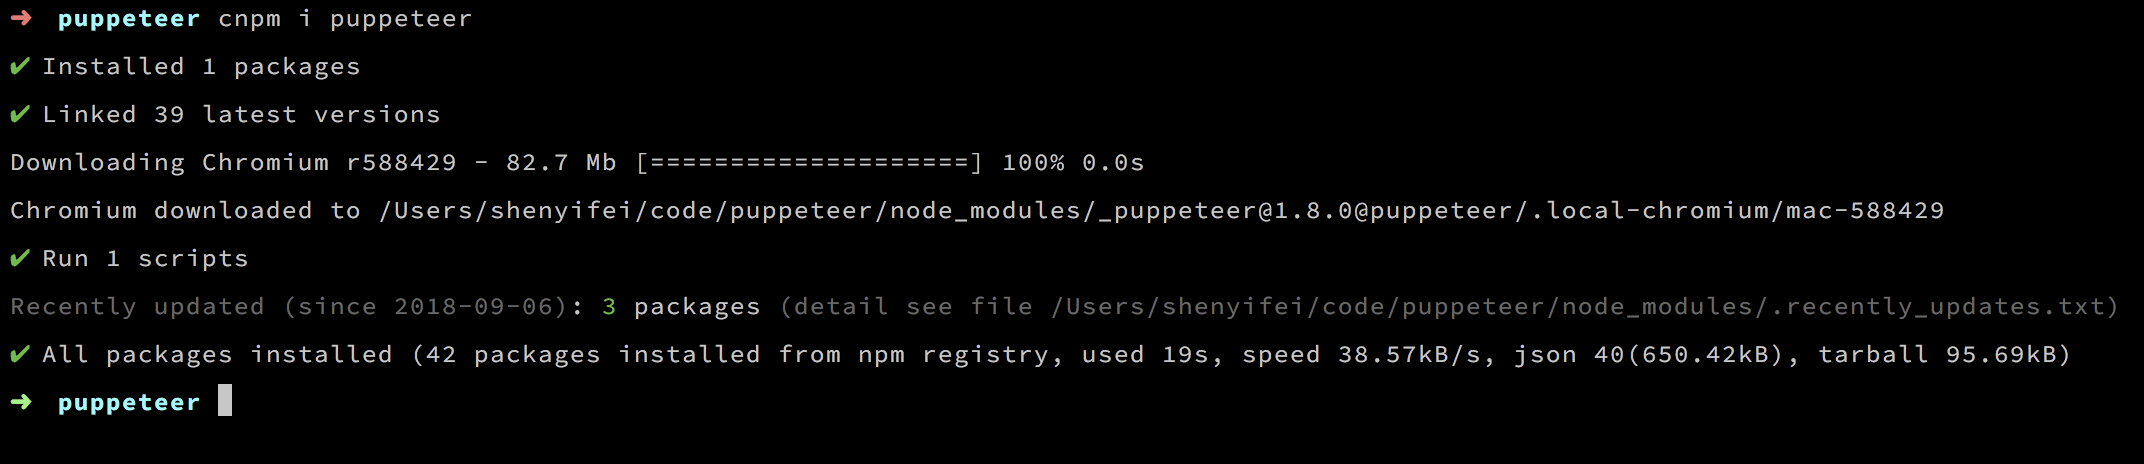
直接动用淘宝镜像,果然可以,感谢马爸爸。
cnpm i puppeteer
测试 puppeteer
然后就是用官方提供的方式来测试。
创建 example.js 文件。
touch example.js && vim example.js
const puppeteer = require('puppeteer');
(async () => {
const browser = await puppeteer.launch();
const page = await browser.newPage();
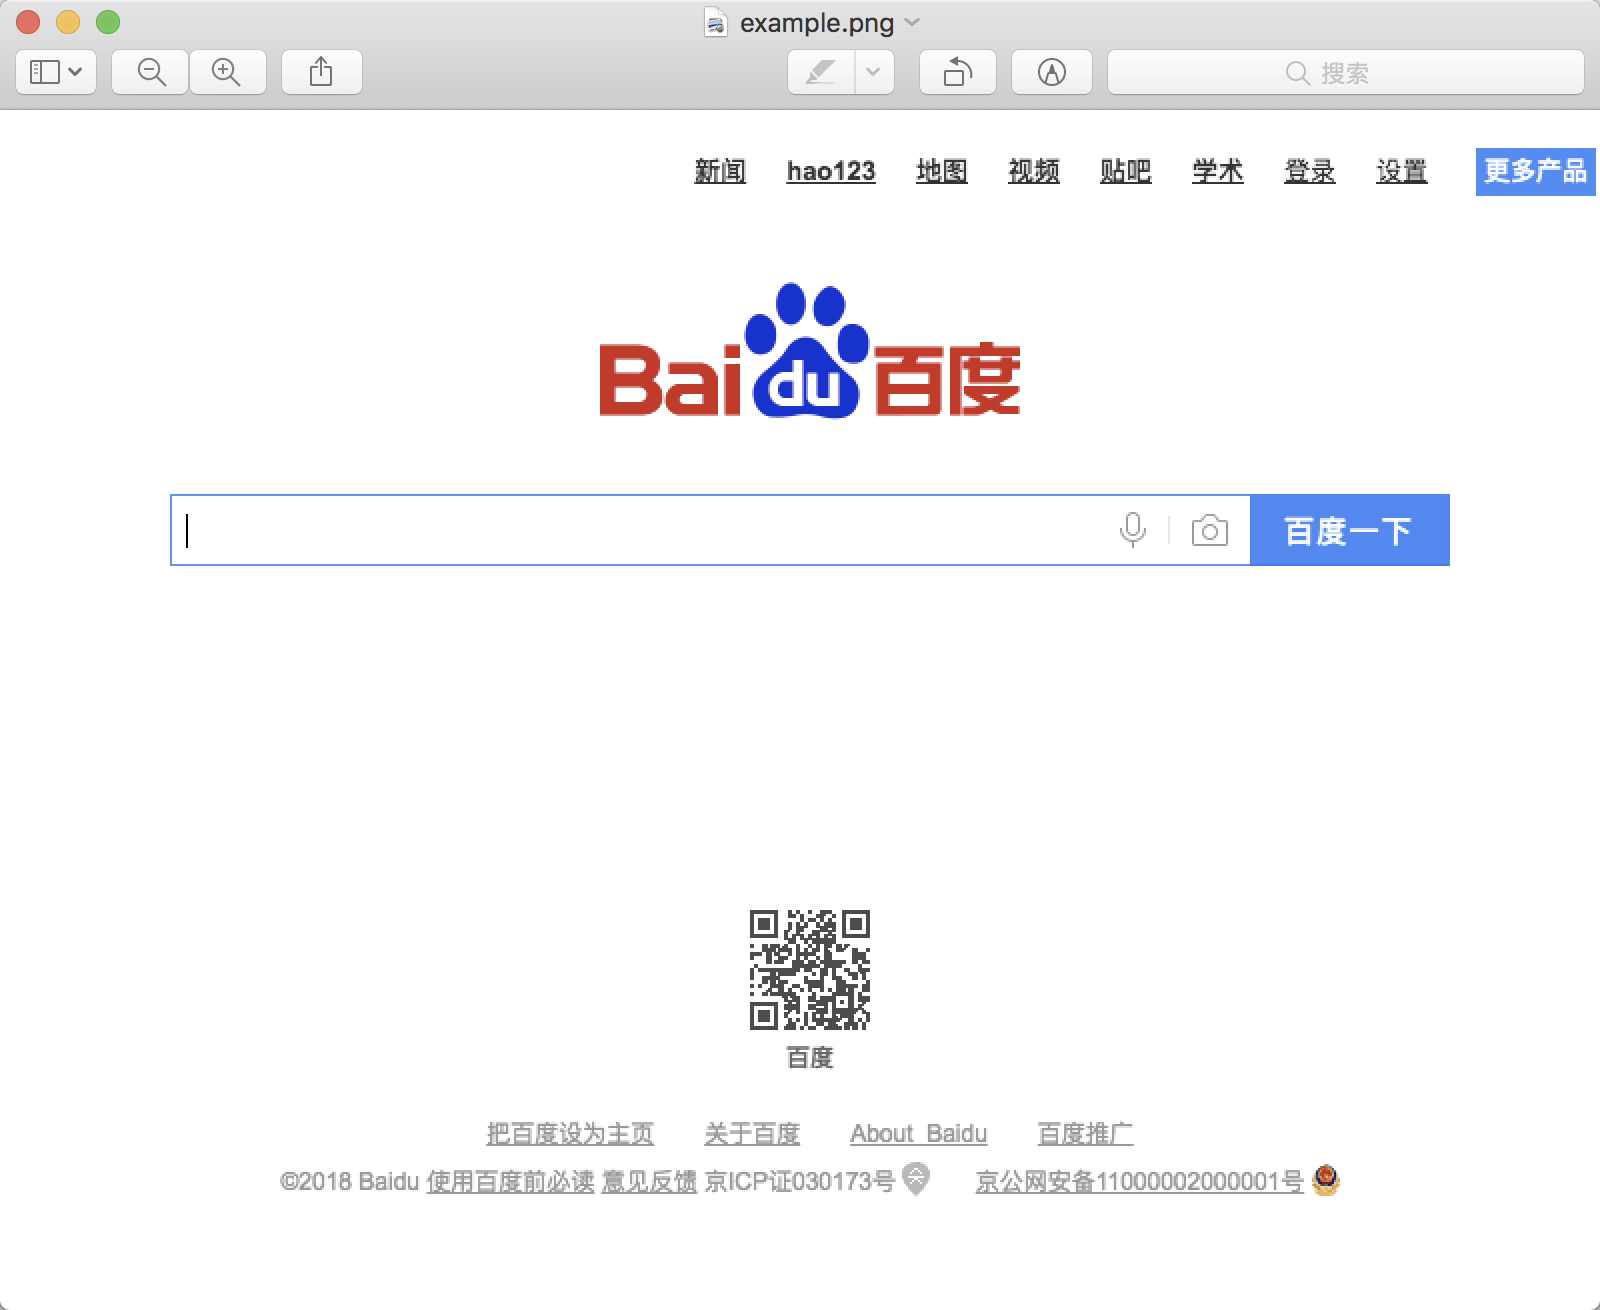
await page.goto('https://www.baidu.com');
await page.screenshot({path: 'example.png'});
await browser.close();
})();
node example.js
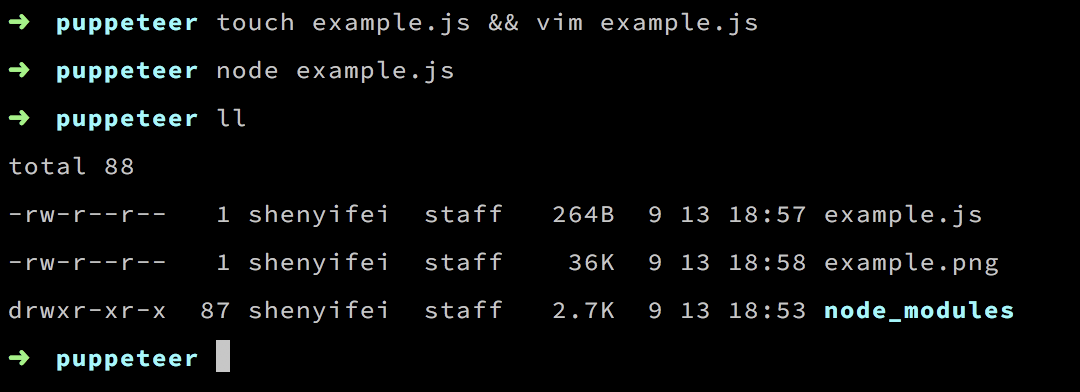
图片成功的显示出来了 😄
php 中使用 puppeteer
然后就是放到PHP代码里面。这里我就直接截取了部分代码讲一下思路。
// 图片保存地址
$imgFilePath = storage_path("app/public/activity-record/{$activityRecord}_{$template}.png");

// js保存地址
$jsFilePath = "/public/activity-record/{$activityRecord}_{$template}.js";

// 访问地址
$url = 'http://' . config('api.domains.mp') . "/activity/record/{$activityRecord}/share?template={$template}";

// 创建文件
$jsFileContents = <<<EOF
const puppeteer = require('puppeteer');

(async () => {
const browser = await puppeteer.launch({args: ['--no-sandbox', '--disable-setuid-sandbox']});
const page = await browser.newPage();
await page.setViewport({ width: 375, height: 667, deviceScaleFactor: 2, isMobile: true });
await page.goto('$url');
await page.screenshot({ path: '$imgFilePath' });

await browser.close();
})();
EOF;

Storage::put($jsFilePath, $jsFileContents);

// 主要也就是这一步比较的坑,填了很久很久
// 正式的环境需要指定node目录
// exec('/usr/local/nodejs/bin/node ' . storage_path("app/$jsFilePath"));
// 本地已经实现了
exec('node ' . storage_path("app/$jsFilePath"));

// 这里是上传到腾讯cos
$disk = \Storage::disk('cosv5');

$cosPath = "jielong/activity/record/{$activityRecord}/t/{$template}.png";

$disk->put($cosPath, fopen("$imgFilePath", 'rb'));
好了本地调试通过了,那就开始走测试环境,这里开始就不停的出现问题,依赖问题等等都出来了。
测试部署
首先是测试换进 Centos 6.7 版本
依赖错误
libXcomposite.so.1
error while loading shared libraries: libXcomposite.so.1: cannot open shared object file: No such file or directory
/home/puppeteer/node_modules/puppeteer/.local-chromium/linux-588429/chrome-linux/chrome: error while loading shared libraries: libXcomposite.so.1: cannot open shared object file: No such file or directory

// 安装依赖
yum install pango.x86_64 libXcomposite.x86_64 libXcursor.x86_64 libXdamage.x86_64 libXext.x86_64 libXi.x86_64 libXtst.x86_64 cups-libs.x86_64 libXScrnSaver.x86_64 libXrandr.x86_64 GConf2.x86_64 alsa-lib.x86_64 atk.x86_64 gtk3.x86_64 -y

// 安装字体
yum install ipa-gothic-fonts xorg-x11-fonts-100dpi xorg-x11-fonts-75dpi xorg-x11-utils xorg-x11-fonts-cyrillic xorg-x11-fonts-Type1 xorg-x11-fonts-misc -y
libatk-bridge-2.0.so.0
error while loading shared libraries: libatk-bridge-2.0.so.0: cannot open shared object file: No such file or directory
/home/puppeteer/node_modules/puppeteer/.local-chromium/linux-588429/chrome-linux/chrome: error while loading shared libraries: libatk-bridge-2.0.so.0: cannot open shared object file: No such file or directory

ldd node_modules/puppeteer/.local-chromium/linux-588429/chrome-linux/chrome
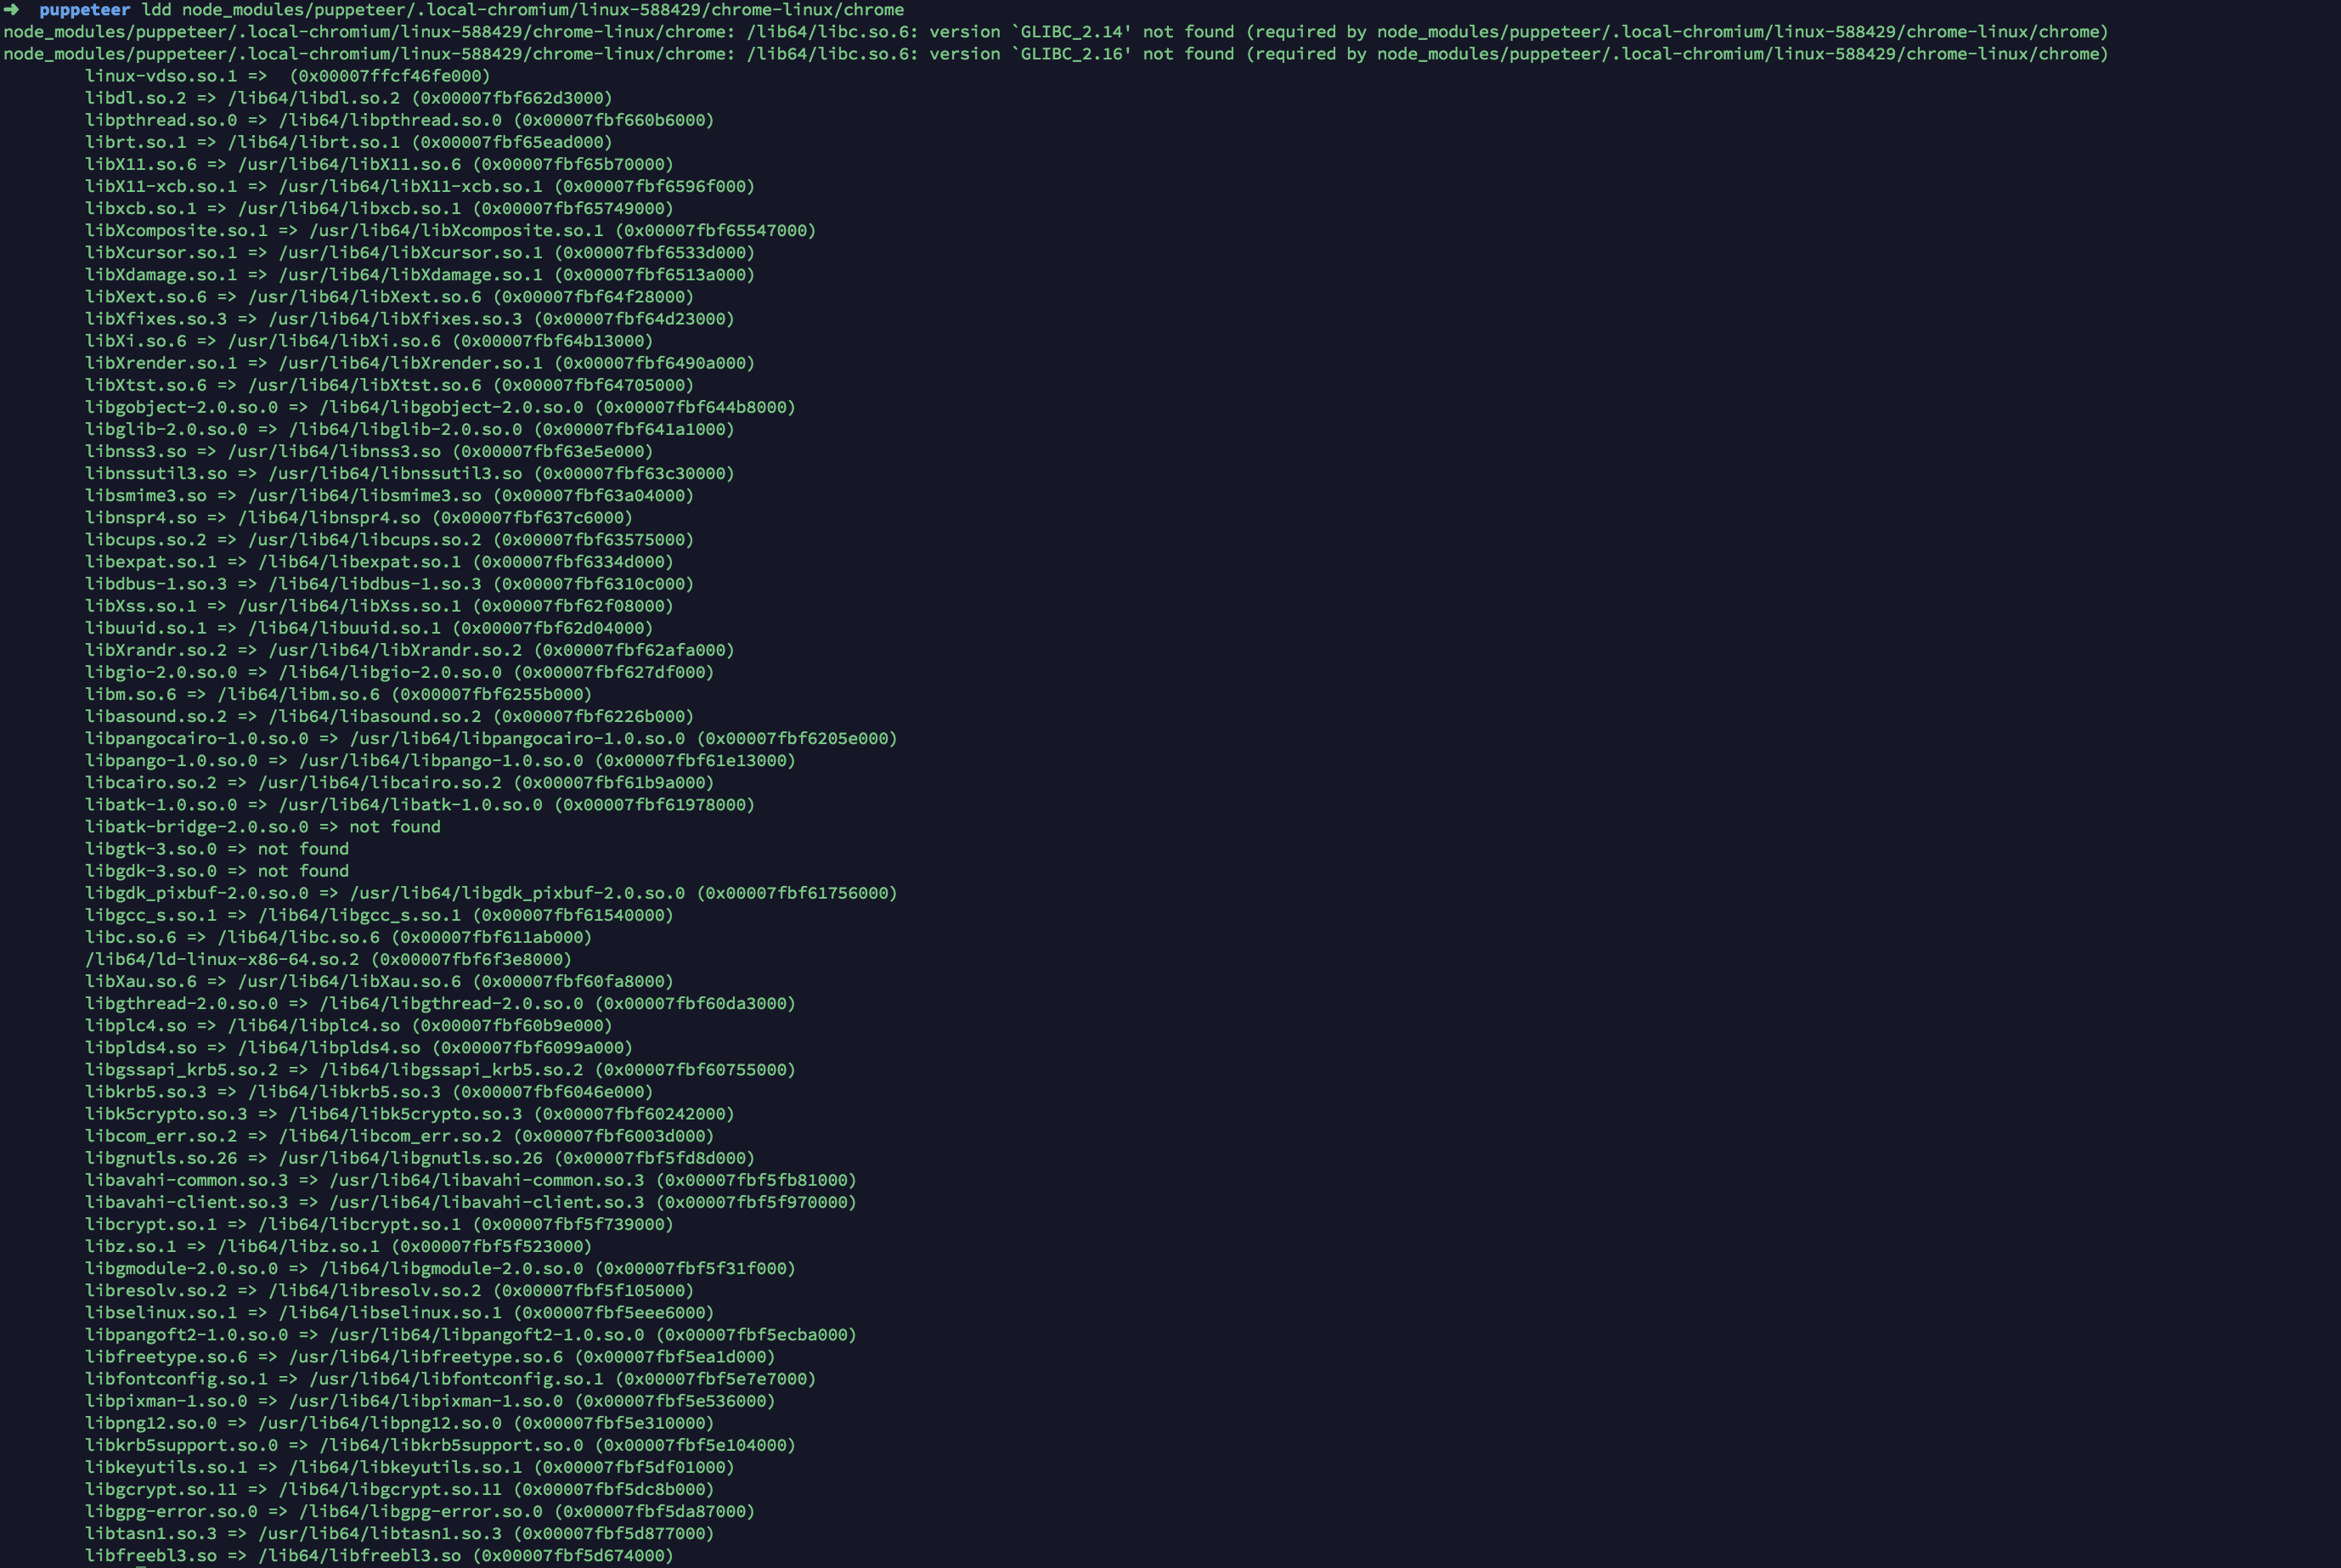
// 网上发现了一个方式,安装一个 firefox 然后把依赖复制过去
yum install firefox-60.1.0-6.el6.centos.x86_64

cp /usr/lib64/firefox/bundled/lib64/libatk-bridge-2.0.so.0 /usr/lib64
cp /usr/lib64/firefox/bundled/lib64/libatspi.so.0 /usr/lib64
cp /usr/lib64/firefox/bundled/lib64/libgdk-3.so.0 /usr/lib64
cp /usr/lib64/firefox/bundled/lib64/libgtk-3.so.0 /usr/lib64
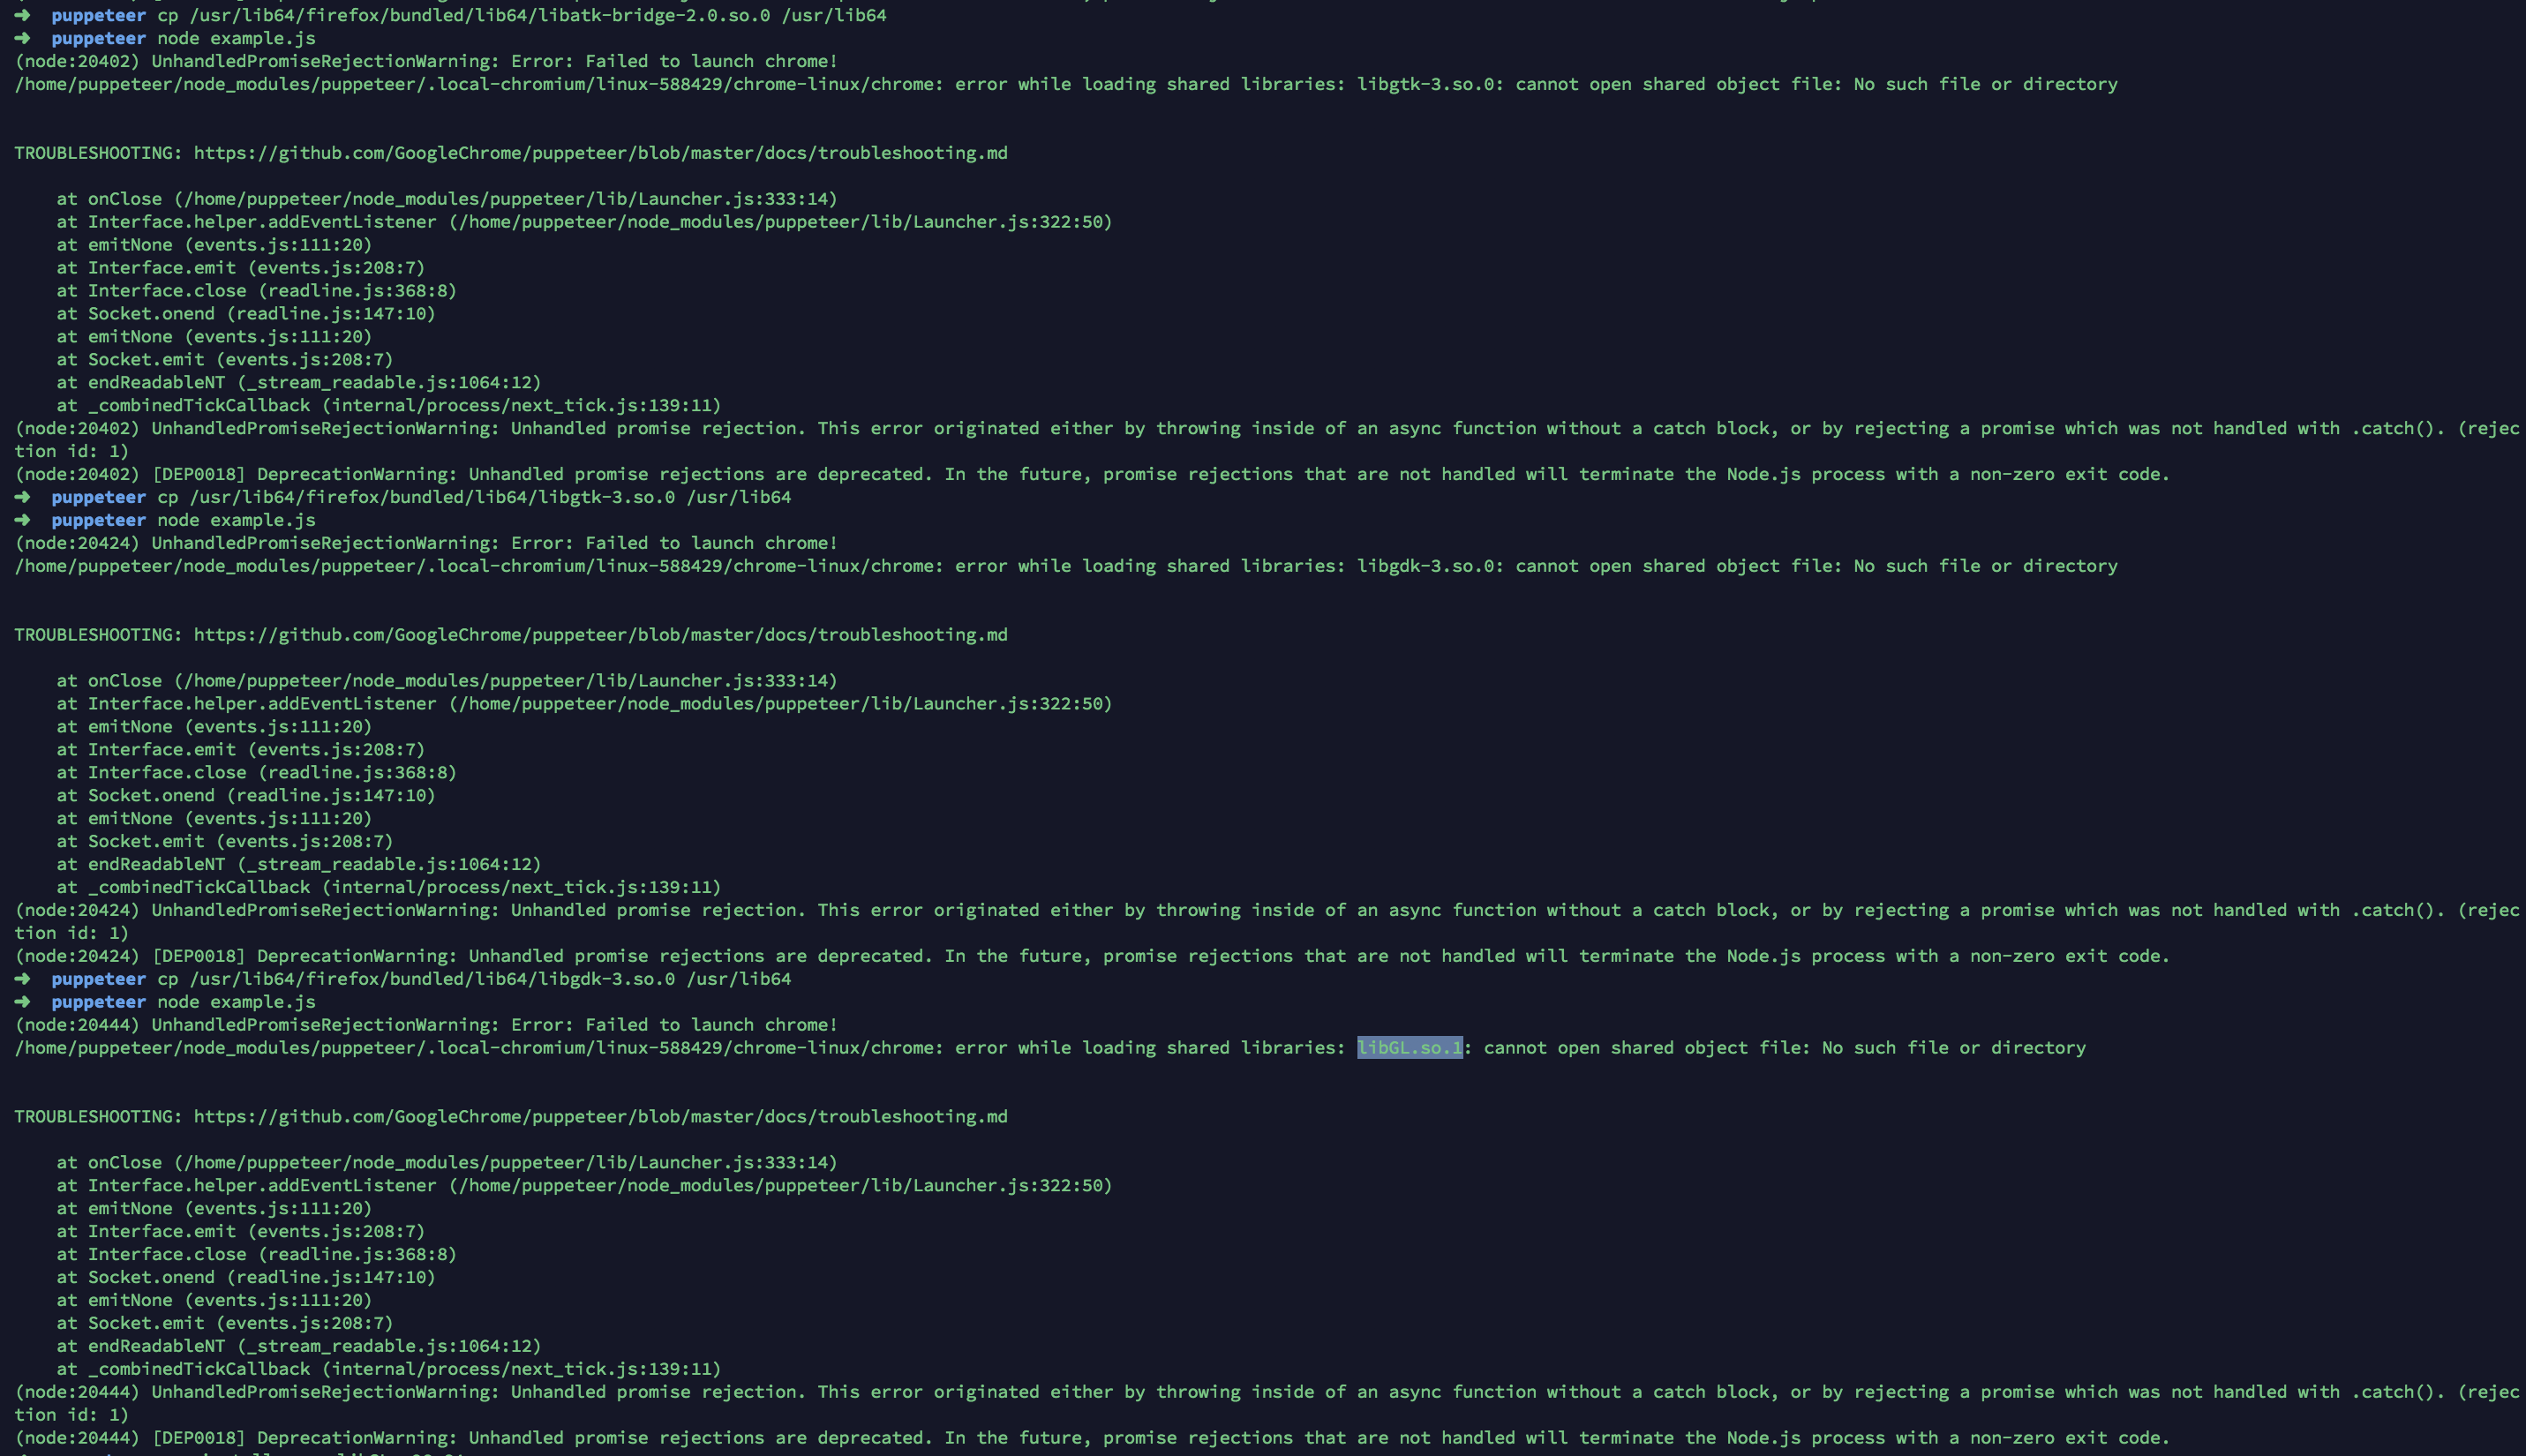
libGL.so.1
/home/puppeteer/node_modules/puppeteer/.local-chromium/linux-588429/chrome-linux/chrome: error while loading shared libraries: libGL.so.1: cannot open shared object file: No such file or directory
yum install mesa-libGL.x86_64
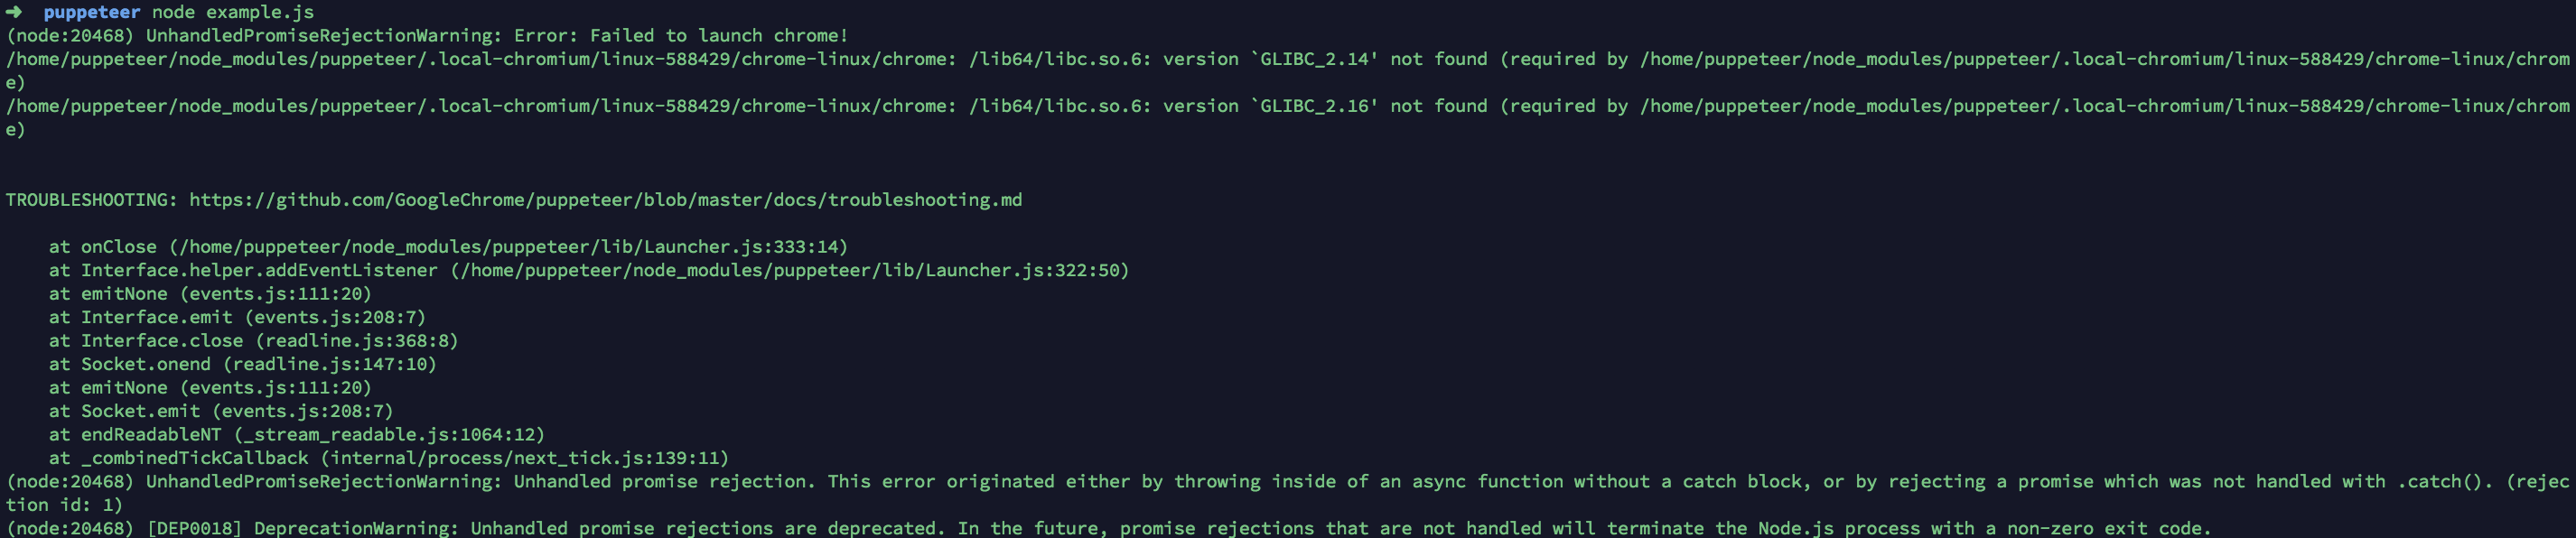
运行下面的命令行可以看到需要 GLIBC_2.14 GLIBC_2.16
objdump -p node_modules/puppeteer/.local-chromium/linux-588429/chrome-linux/chrome
发现只支持到 GLIBC_2.12
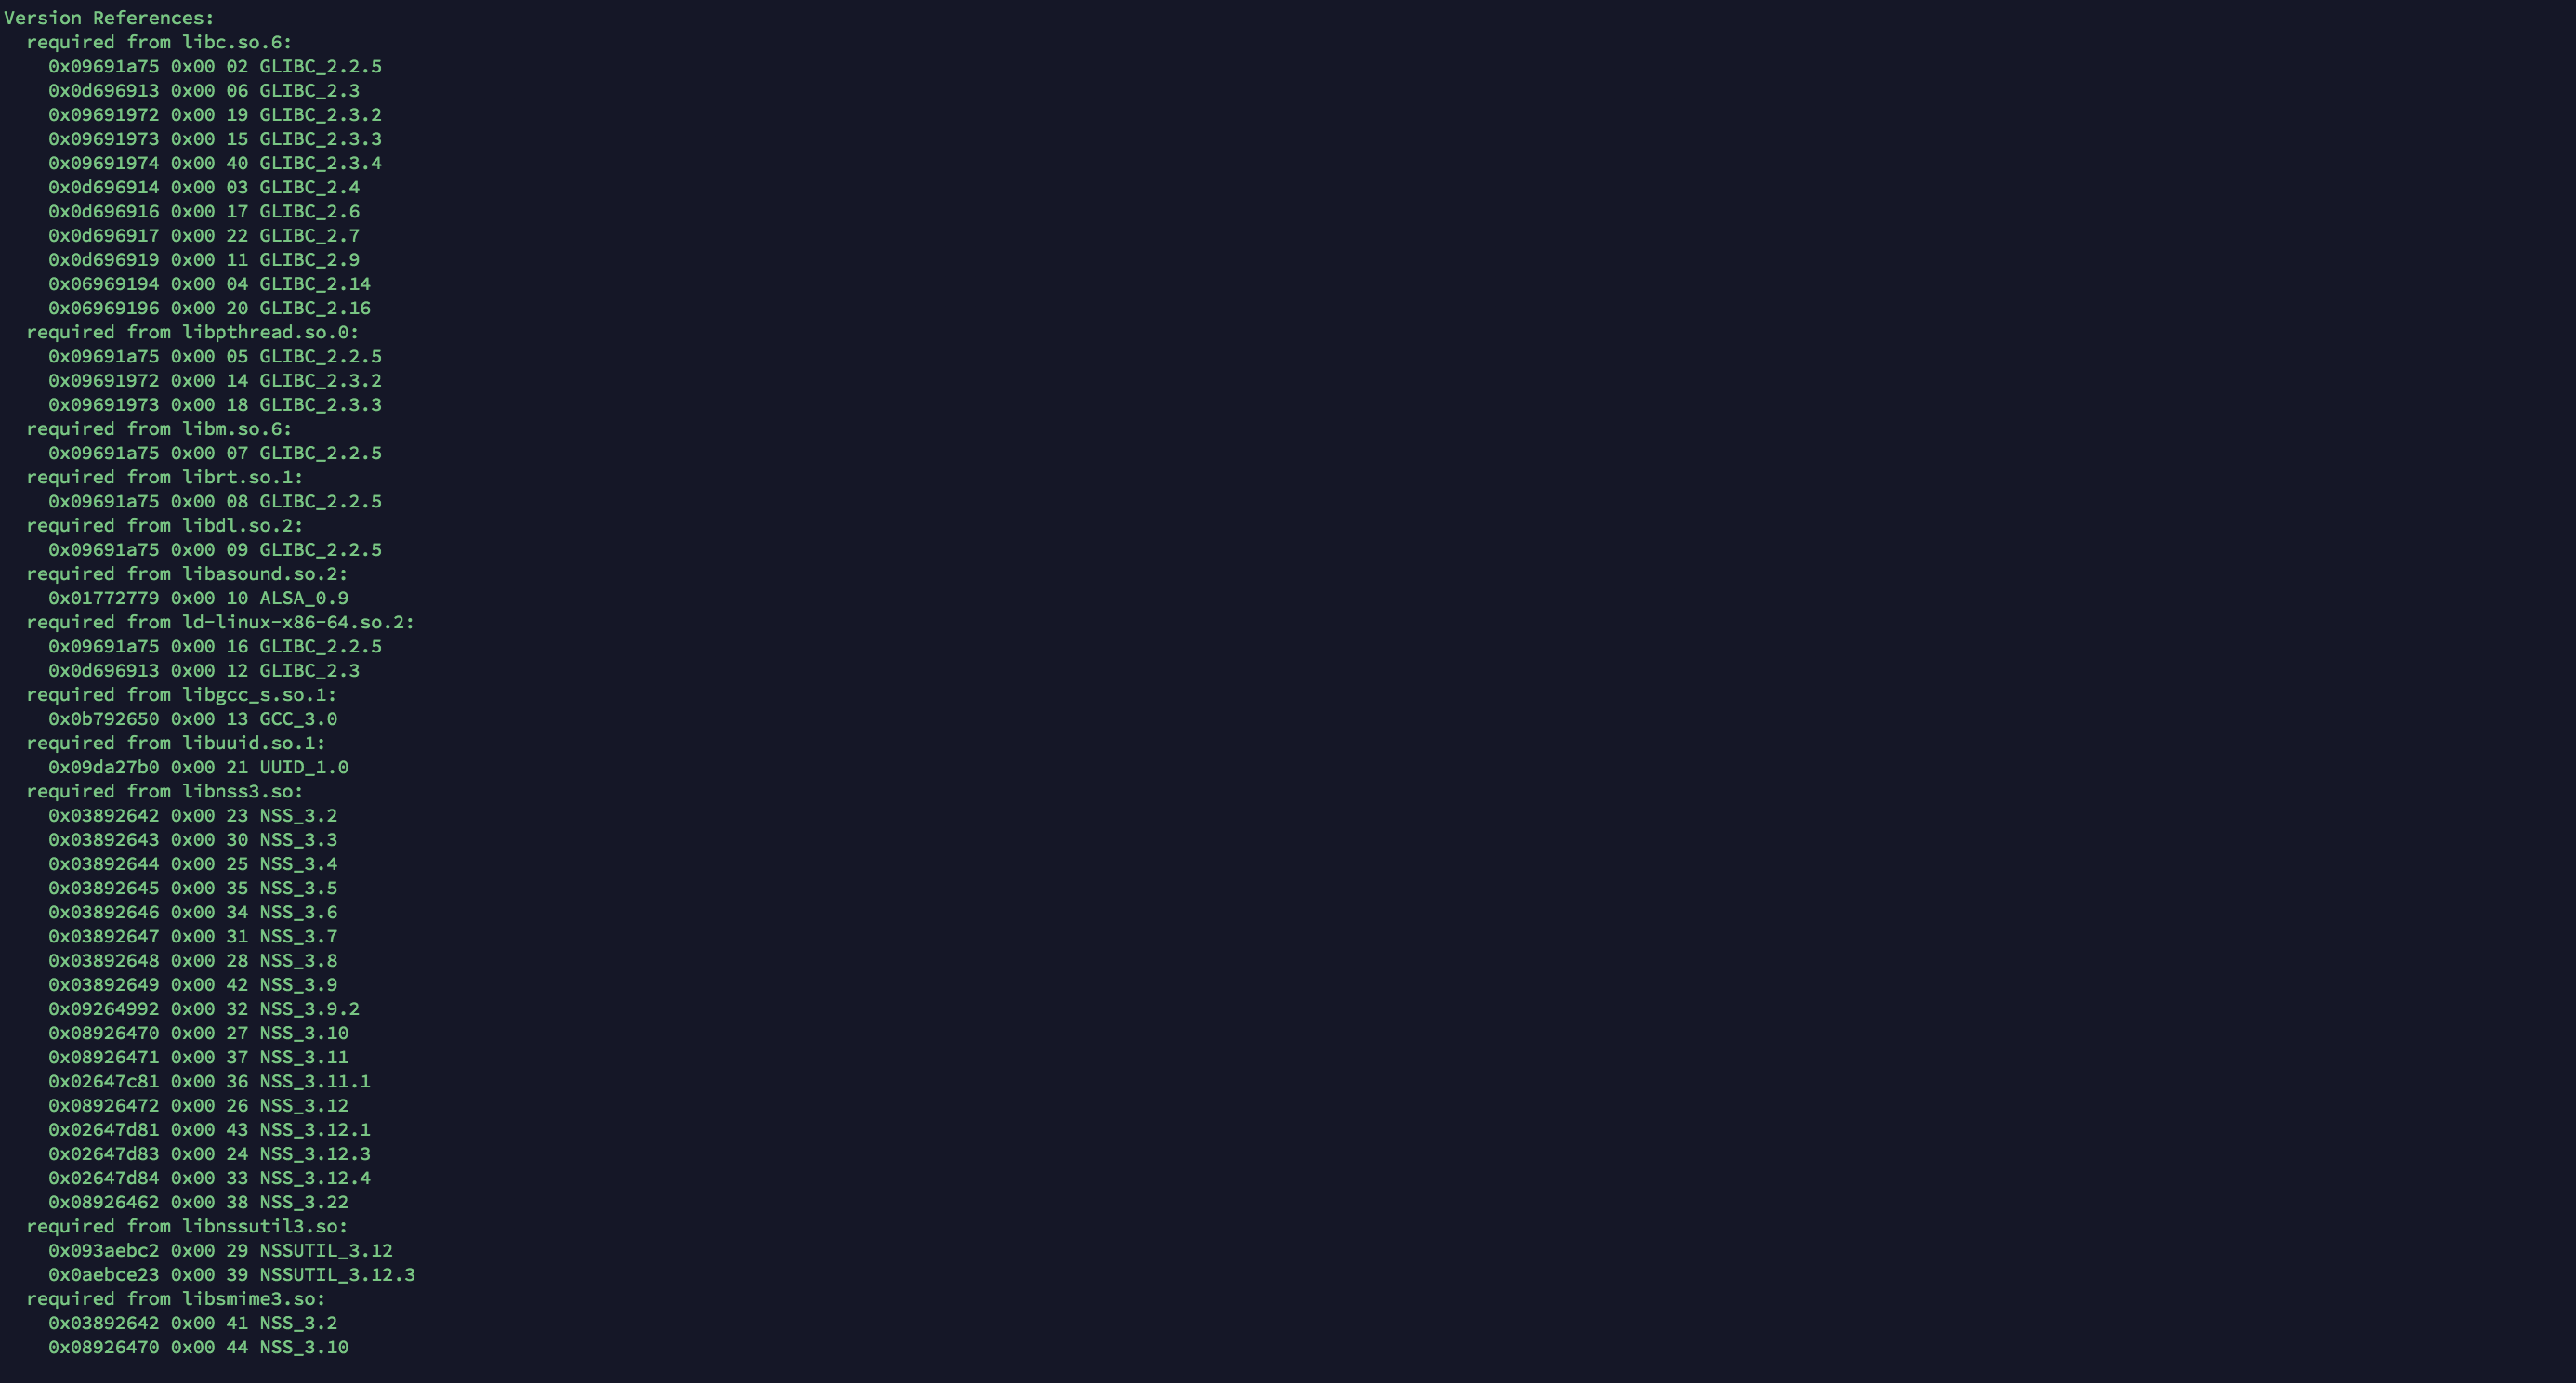
strings /lib64/libc.so.6 |grep GLIBC_

所以需要安装 GLIBC_2.14
libc.so.6: version 'GLIBC_2.14' not found报错提示的解决方案
但是GLIBC_2.16在机器上怎么装都装不上,所以后来放弃了。
解决方案是安装低版本的puppeteer 大概是 1.4 以下的版本
cnpm i puppeteer@1.4
好像没有找到不需要 GLIBC_2.14 的包
最后是安装了 GLIBC_2.14 然后执行命令之后发现了一个问题。
版本错误
libcairo-gobject.so.2: undefined symbol: cairo_region_destroy
libcairo-gobject.so.2: undefined symbol: cairo_region_destroy
后面反正是没有找到解决方案。
Docker 部署
centos 安装 docker
yum install docker-io
service docker start
vim Dockerfile
docker build 容器
FROM node:8-slim

# See https://crbug.com/795759
RUN apt-get update && apt-get install -yq libgconf-2-4

# Install latest chrome dev package and fonts to support major charsets (Chinese, Japanese, Arabic, Hebrew, Thai and a few others)
# Note: this installs the necessary libs to make the bundled version of Chromium that Puppeteer
# installs, work.
RUN apt-get update && apt-get install -y wget --no-install-recommends \
    && wget -q -O - https://dl.google.com/linux/linux_signing_key.pub | apt-key add - \
    && sh -c 'echo "deb [arch=amd64] http://dl.google.com/linux/chrome/deb/ stable main" >> /etc/apt/sources.list.d/google.list' \
    && apt-get update \
    && apt-get install -y google-chrome-unstable fonts-ipafont-gothic fonts-wqy-zenhei fonts-thai-tlwg fonts-kacst ttf-freefont \
      --no-install-recommends \
    && rm -rf /var/lib/apt/lists/* \
    && apt-get purge --auto-remove -y curl \
    && rm -rf /src/*.deb

# It's a good idea to use dumb-init to help prevent zombie chrome processes.
ADD https://github.com/Yelp/dumb-init/releases/download/v1.2.0/dumb-init_1.2.0_amd64 /usr/local/bin/dumb-init
RUN chmod +x /usr/local/bin/dumb-init

# Uncomment to skip the chromium download when installing puppeteer. If you do,
# you'll need to launch puppeteer with:
#     browser.launch({executablePath: 'google-chrome-unstable'})
# ENV PUPPETEER_SKIP_CHROMIUM_DOWNLOAD true

# Install puppeteer so it's available in the container.
RUN npm i puppeteer

# Add user so we don't need --no-sandbox.
RUN groupadd -r pptruser && useradd -r -g pptruser -G audio,video pptruser \
    && mkdir -p /home/pptruser/Downloads \
    && chown -R pptruser:pptruser /home/pptruser \
    && chown -R pptruser:pptruser /node_modules

# Run everything after as non-privileged user.
USER pptruser

ENTRYPOINT ["dumb-init", "--"]
CMD ["google-chrome-unstable"]
docker build -t puppeteer-chrome-linux .
创建 puppeteer.sh
然后创建了一个文件 puppeteer.sh
#!/bin/bash
readonly USAGE="Usage: puppeteer.sh yourfile.js"

basepath=$(pwd)

local_path="$basepath/storage/app/public/activity-record/"

if [ -z "$1" ]
then
  echo "File not specified."
  echo $USAGE
  exit 0
fi

echo "Running $1 in Puppeteer..."

file=`cat $1`

# set -x # debug on
docker run -it --net=host -v $local_path:/home/pptruser/Downloads --privileged=true --rm --cap-add=SYS_ADMIN \
  --name puppeteer-chrome puppeteer-chrome-linux \
  node -e "$file"
puppeteer.sh 生成图片
使用 puppeteer.sh 来调用 example.js
./puppeteer.sh example.js
php 去调用 puppeteer.sh
exec("./puppeteer.sh example.js")
思考: php 如何使用 root 权限
会发现一个问题,在命令行的时候是可以执行的,但是在网页上面是不行,最后发现是权限问题。命令行是 root 权限但是在网站的时候是 www 权限,因为权限是通过 nginx 的用户来定的。然后又想到一个方法是用队列执行,队列是可以使用 root 权限去执行的,没想到是可以的。但是队列获取不到队列执行的结果,所以每次执行一次就不能用了,需要手动的重启队列,最后还是放弃了。
正式部署
Centos 7.4 一切没有问题。
主要是一个问题,生成图片的时候文字有方格乱码,解决的方案是使用本地的字体库。
目前使用队列来执行代码,但是无法实时的更新,所以尝试 sleep 方法,但是还是不能很好的解决这个问题。
思考后 node express 开发一个 api 来生成图片。
安装 express puppeteer 等工具
mkdir /home/www/puppeteer
cd /home/www/puppeteer
// chrome 无头
cnpm i puppeteer
// 腾讯cos
cnpm i cos-nodejs-sdk-v5 --save
// express
cnpm i express
// 环境变量
cnpm i dotenv
// pm2进程管理
cnpm install pm2 -g
express 搭建 api 服务器
index.js
const express = require('express')
const app = express()// 引入json解析中间件
const puppeteer = require('puppeteer');
const bodyParser = require('body-parser');
const COS = require('cos-nodejs-sdk-v5');
const basePath = process.cwd();
const dotenv = require('dotenv').config({ path: `${basePath}/../jielong_mp/.env` });

var cos = new COS({
    AppId: process.env.COSV5_APP_ID,
    SecretId: process.env.COSV5_SECRET_ID,
    SecretKey: process.env.COSV5_SECRET_KEY,
});

// COSV5_APP_ID = 1251581441
// COSV5_SECRET_ID = AKIDbFnBPV9N6g8PYY91TkJp6D92pT0NIpoc
// COSV5_SECRET_KEY = mOp9MRMF2eN0Tq26zhEaZO3XsJk3CA1i
// COSV5_TIMEOUT = 60
// COSV5_CONNECT_TIMEOUT = 60
// COSV5_BUCKET = kemanyun
// COSV5_REGION = ap - shanghai
// COSV5_CDN = #https://{your-bucket-name}-{your-app-id}.file.myqcloud.com
// COSV5_SCHEME = https

// 添加json解析
app.use(bodyParser.json());
app.use(bodyParser.urlencoded({extended: false}));

app.post('/api/puppeteer', (req, res) => {
    const activity_record_id = req.body.activity_record_id;
    const template = req.body.template;
    const path = `${basePath}/../jielong_mp/storage/app/public/activity-record/${activity_record_id}_${template}.png`;
    const mp_domain = process.env.MP_DOMAIN;
    const url = `http:/${mp_domain}/activity/record/${activity_record_id}/share?template=${template}`;

    (async () => {
        const browser = await puppeteer.launch({ args: ['--no-sandbox', '--disable-setuid-sandbox'] });
        if (process.env.APP_ENV === 'local') {
            const browser = await puppeteer.launch();
        }
        const page = await browser.newPage();
        await page.setViewport({ width: 375, height: 667, deviceScaleFactor: 2, isMobile: true });
        await page.goto(url);
        await page.screenshot({ path: path });

        await browser.close();
        // 分片上传
        await cos.sliceUploadFile({
            Bucket: process.env.COSV5_BUCKET,
            Region: process.env.COSV5_REGION,
            Key: process.env.COSV5_BUCKET_PREFIX + `/activity/record/${activity_record_id}/t/${template}.png`,
            FilePath: path
        }, function (err, data) {
        });

        await res.status(201).json({
            message: '创建图片成功',
            status_code: '201',
        });
    })();

})

app.listen(3000, () => console.log('Example app listening on port 3000!'))
pm2 来管理 express
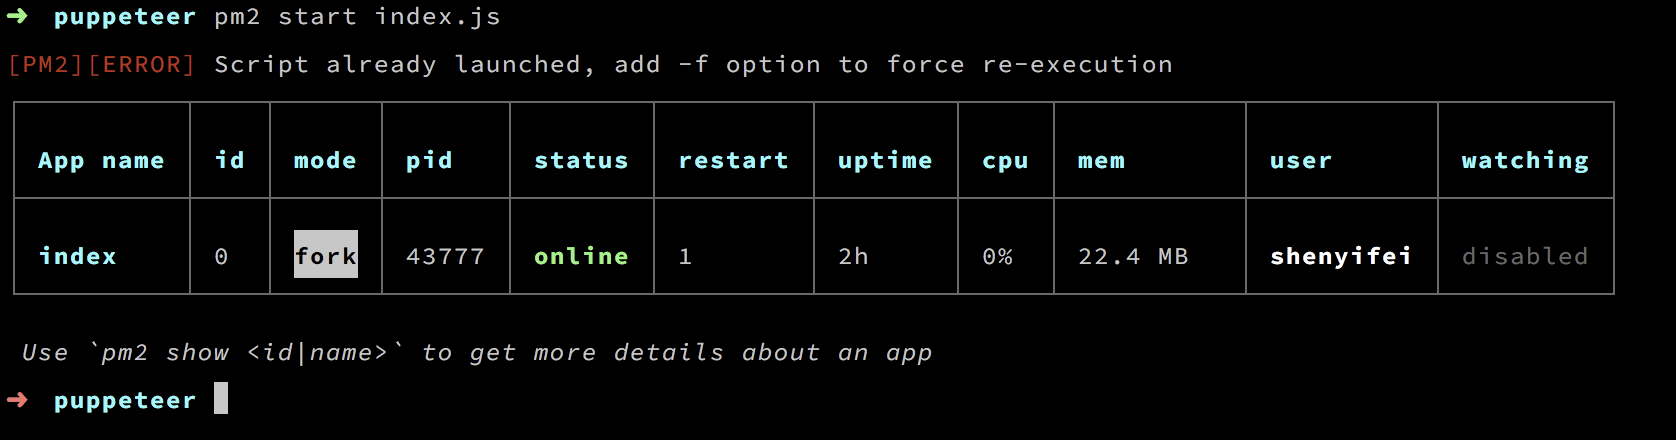
pm2 start index.js
php 调用接口来实现
use GuzzleHttp\Client;

...

$guzzleCLient = new Client();

$res = $guzzleCLient->post('http://127.0.0.1:3000/api/puppeteer', [
    'form_params' => [
        'activity_record_id' => $activityRecord,
        'template' => $template
    ]
]);
扩展分享
最后我才发现了已经有大神有解决方案了,干得漂亮。
nesk/rialto 工作原理是创建一个Node进程并通过 socket 与它通信。
Puphpeteer:Chrome 无头浏览器 Puphpeteer 项目的 PHP 桥梁
目前线上使用接口,没有使用这个包